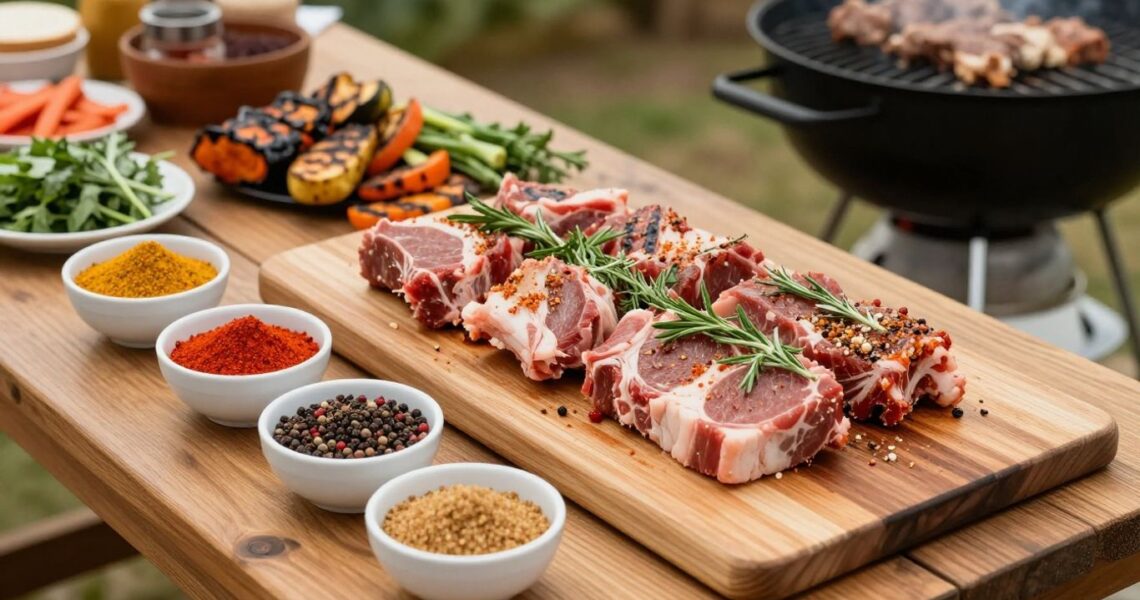
BBQ rubs made easy: How to create flavorful blends for every cookout
September 22, 2026Key Takeaways
A good BBQ rub is less about a long ingredient list and more about balance, freshness and thoughtful application.
- Start with salt, sweetness, savoury depth and measured heat.
- Use fresh, well-stored spices for a brighter blend.
- Adjust the rub to suit the meat, rather than using one mix for everything.
- Apply an even coating and give the seasoning time to work.
- Store small batches properly so they stay aromatic and easy to customise.
Start with the essential BBQ rub ingredients
BBQ rubs made easy begins with understanding what each ingredient contributes. We usually want a blend that seasons the meat, adds colour and creates a pleasing crust as it cooks. The best mixes do not need every spice in the cupboard. A few well-chosen ingredients, used in sensible proportions, can carry a whole cookout.
Balance sweet, salty, savory, and spicy flavors
Salt brings the main seasoning, while sugar softens sharp edges and helps develop colour. Savoury ingredients such as garlic, onion, cumin or dried herbs add depth, and chilli brings heat or a gentle tingle. We aim for contrast rather than letting one flavour dominate, because a rub that tastes exciting in the bowl can become tiring on a whole cut of meat.
A useful first taste should be cautious: sample a tiny pinch, then imagine it spread over unsalted meat. Balance matters more than intensity, particularly when the rub will sit on the surface for several hours.
Choose fresh spices for better aroma and taste
Spices lose their fragrance gradually, especially after opening. We check ground spices by smelling them before mixing; if the aroma is faint or dusty, the finished rub will probably taste flat. Whole spices, freshly ground when practical, can give a more pronounced character, although a convenient pantry blend is perfectly useful for weeknight cooking.
Keep a separate spoon for tasting and avoid dipping one that has touched raw meat into the jar. That small habit protects the rest of the batch and makes seasoning easier to manage.
Understand the role of sugar in browning
Sugar can encourage a darker, more attractive crust as the surface heats. It also rounds out the savoury and spicy elements, which is why brown sugar, raw sugar or another granulated sweetener appears in many BBQ blends. The trade-off is that sugar can darken or burn before a thick cut has finished cooking, particularly over a very hot grill.
We therefore treat sugar as one part of the blend rather than its foundation. When cooking hot or close to the flame, a less sweet rub or a later application can give us more control over the surface.
Build a rub around the type of meat
The meat sets the direction. Pork can handle warm sweetness and aromatic spices, beef often suits peppery, savoury flavours, and chicken benefits from a flexible mix that supports rather than overwhelms its milder taste. Fish and vegetables generally need a lighter hand and fewer assertive spices.
Before mixing, we think about the cooking method as well. A long, slow smoke gives a rub time to meld, while a quick grill rewards a simpler blend with ingredients that will not scorch too quickly.
Use a simple formula to create your own rub
A dependable formula gives us a starting point without turning the process into a rigid recipe. We can begin with a measured base, then change one element at a time. This makes it easier to understand what we like and prevents a promising batch from becoming muddled.
The formula also scales well. Once we know how the blend behaves on one meal, we can prepare a little more for the next cookout without losing the original balance.
Measure a reliable base ratio
We can start with four parts paprika or another mild, colourful base, two parts salt, two parts sugar and one part black pepper. This is a framework, not a rule, so we can reduce the salt for a lighter seasoning or leave out the sugar for high-heat cooking. Use the same measuring spoon throughout so the proportions remain consistent.
Write down the first version, even if it is only a few spoonfuls. A simple note turns a lucky combination into something we can repeat and refine.
Layer herbs, spices, and aromatics
Once the base tastes balanced, we can add garlic, onion, mustard powder, cumin, dried oregano or another herb that fits the meat. Add these in small amounts, tasting the dry mixture between additions. Aromatics should give the rub character without hiding the paprika, salt and pepper that hold it together.
For a more even texture, whisk the ingredients in a wide bowl rather than shaking them straight into a narrow jar. That helps break up pockets of salt or chilli before they reach the meat.
Adjust heat without overpowering the blend
Heat is easiest to control when we add it gradually. Cayenne gives a direct burn, chilli flakes bring texture and a smoky chilli powder can add warmth with a deeper note. We should choose one main heat source first, then decide whether a second one genuinely improves the mix.
A rub should still taste good before it becomes hot. If the chilli arrives first and everything else disappears, reduce it and restore the savoury or sweet elements rather than simply adding more of every ingredient.
Make a small test batch before scaling up
Small batches let us correct mistakes cheaply and compare variations side by side. We can season a few small pieces of meat, cook them in the same way and taste them together. This is more useful than judging the dry powder alone, because heat changes sweetness, bitterness and salt perception.
For an organised test, change only one feature at a time: more pepper in one sample, less sugar in another or a different herb in a third. Once we choose a favourite, we can multiply the quantities confidently.
Match BBQ rubs to different meats
The same rub can be pleasant on several foods, but matching the blend to the meat usually produces a more deliberate result. We consider fat, texture, cooking time and the strength of the meat itself. That approach keeps the seasoning supportive rather than generic.
There is no need to prepare six completely different jars for one gathering. A versatile base can be divided, then adjusted with a few targeted ingredients for each dish.
Create a classic rub for pork
Pork works well with a gently sweet, warm blend. We might combine paprika, brown sugar, salt, black pepper, garlic, onion and a small amount of mustard powder, then add chilli if we want a livelier finish. The sweetness suits ribs and shoulder, while the savoury ingredients keep chops from tasting like dessert.
For a long cook, we keep the coating even and avoid piling it too thickly into crevices. A balanced layer will form a flavourful bark without masking the meat.
Develop a bold blend for beef
Beef can carry a stronger savoury profile, especially on brisket, steaks or beef ribs. Coarse black pepper, salt, garlic and onion make a clear foundation, with paprika or a little cumin adding colour and depth. We usually keep sugar restrained so the crust can develop without burning during a hot sear.
The cut still matters. A thin steak needs a lighter coating and shorter contact time, while a large roast can take a more assertive surface seasoning before a slow cook.
Keep chicken rubs balanced and versatile
Chicken accepts a broad range of flavours, but its milder meat can be overwhelmed quickly. A mix of paprika, garlic, onion, black pepper, salt and a modest amount of sugar gives us a reliable starting point for wings, thighs and whole birds. We can add dried herbs for a fresher, more aromatic direction.
Because chicken often cooks at a range of temperatures, we keep an eye on the sugar level. A moderate blend is easier to use across both the grill and the smoker.
Season seafood and vegetables with lighter flavors
Seafood and vegetables usually benefit from a thinner coating and brighter aromatics. We can use paprika, pepper, garlic, dried herbs, citrus zest or a small amount of chilli, while keeping heavy smoke and sweetness in check. The goal is to add a gentle crust or savoury lift without covering delicate flavours.
Apply the rub shortly before cooking when the food is moist or fragile. This keeps the surface from becoming pasty and lets us handle it without rubbing away the seasoning.
Apply BBQ rubs for the best results
Good ingredients still need good technique. We prepare the surface, decide how far ahead to season and apply enough rub to create flavour without wasting it. We also consider whether the cooking method is gentle enough for a sugar-heavy coating.
Our aim is an even, dry-looking layer that clings to the meat. Uneven handfuls create salty patches, while excessive rubbing can disturb the surface and leave bare spots.
Prepare the meat before seasoning
Pat the meat dry with paper towel so the rub can adhere rather than slide off. Trim loose fat or silverskin where appropriate, and make sure the surface is clean and ready before opening the seasoning jar. Dry meat also browns more readily, giving the rub a better chance to form a crust.
We season over a tray or board with enough room to turn the cut. That keeps stray spices contained and makes it easier to coat every side evenly.
Decide when to apply the rub
We can season immediately before cooking for a quick, clean flavour, or apply the rub earlier when we want the salt and aromatics to work into the surface. The best timing depends on the cut, the amount of salt and the cooking plan. If the rub contains plenty of sugar, applying it too early can make the surface wetter than we want.
For many cooks, a short rest while the grill or smoker comes to temperature is a practical middle ground. The coating settles without turning the preparation into an all-day task.
Use the right amount for each cut
Large, uneven cuts can take a more generous coating than thin steaks or delicate fillets. We sprinkle from a height so the powder lands evenly, then press it gently into place rather than scrubbing it into the meat. Any excess left on the tray should not be returned to the storage jar.
A useful check is visual rather than numerical: the surface should be covered, but we should still see its shape and texture. If the meat looks buried under seasoning, the coating is probably too heavy.
Add a binder without masking the flavor
A binder can help dry seasoning cling to a smooth or very lean surface. A thin film of oil, mustard or another suitable moist ingredient is enough; it should not become a separate sauce. We spread it sparingly, then add the rub while the surface is still tacky.
The binder should support the seasoning, not compete with it. When we are unsure, we use less and let the meat’s natural moisture do more of the work.
Avoid common homemade rub mistakes
Most rub problems are easy to trace once we know what to look for. Too much salt, stale spices, uneven mixing and excessive heat can all make a carefully planned blend disappointing. We correct these issues by changing one variable at a time.
It also helps to taste the blend in context. A pinch from the jar tells us about aroma, but a cooked sample reveals how the seasoning behaves after heat and meat juices enter the picture.
Prevent overly salty or sweet blends
Salt and sugar are both powerful, particularly when they are finely ground. We measure them separately and avoid adding extra handfuls simply because the mixture looks pale. If the rub is intended for a thick cut, remember that the seasoning will be spread across a larger surface than it occupies in the bowl.
A good base blend should taste noticeable but not harsh. We can always add more during the next batch, whereas rescuing an overly salty coating is much more difficult.
Keep spices from clumping
Moisture is the main enemy of a loose rub. We use completely dry spoons, keep the container away from steam and whisk the ingredients before transferring them to storage. If brown sugar forms lumps, break them apart before measuring so the sweet element distributes properly.
For a batch that will sit for a while, a clean, dry jar with a tight lid is more useful than a decorative container that lets in air. Shake or stir the rub before each use.
Avoid burning sugar-heavy rubs
Sugar browns quickly over high heat, especially when the meat is close to the coals or a burner. We can reduce the sugar, cook more gently or apply a sweeter finishing seasoning later in the process. Keeping the surface from flaring also protects the flavour of the spices.
Dark colour alone does not always mean the rub has burned, so we look for a bitter smell and a blackened, brittle crust. If those signs appear, the heat needs attention before we adjust the recipe.
Correct an unbalanced finished mixture
If a blend is too hot, we can dilute it with more of the mild base ingredients. Too much sweetness may be softened with extra paprika, pepper and savoury aromatics, while an overly salty batch usually needs dilution rather than a sharp acidic addition. We make corrections in small portions and retaste after each one.
Keep notes on the rescue attempt. Even an imperfect batch can show us which flavours work together and which proportions to avoid next time.
Store and customize BBQ rubs with confidence
Storage determines how long a homemade rub remains useful. We want to protect it from moisture, heat and strong pantry smells, while keeping the label clear enough to identify the blend later. Small batches are often better than one huge jar that sits untouched for months.
Once the basic formula feels familiar, customising becomes simple. We can make a smoky version for a weekend cook, a low-sugar blend for high heat or a milder mix for a mixed table of guests.
Use airtight containers and proper labels
A clean, airtight jar helps keep the spices dry and aromatic. We label the blend with its name, the main ingredients and the date we mixed it. If the recipe is a variation, we note that too, because “extra chilli” is much more useful later than an unlabeled jar of red powder.
Store the container in a cool, dark cupboard rather than beside the grill or above the stove. We shake it before use and check for moisture, unusual odours or visible changes.
Know how long homemade rubs stay fresh
Homemade rubs do not suddenly become unusable on one particular day, but their aroma and flavour fade over time. We use the condition of the spices as our guide: a dry, fragrant blend is more promising than one that smells flat, damp or stale. Ingredients with more moisture deserve extra caution and are best mixed shortly before use.
Making only what we expect to use within a reasonable cooking season keeps the blend lively. When in doubt, mix a small fresh batch rather than trying to disguise a tired one.
Adapt blends for sugar-free and low-sodium diets
We can reduce or omit sugar when cooking at high heat, then build complexity with paprika, pepper, garlic, onion, herbs and other dry aromatics. For a lower-sodium version, reduce the salt and rely more on contrast from spice, smoke-style ingredients and herbs. The result may need a lighter application because salt is no longer carrying as much of the flavour.
We should label variations clearly so guests know which jar they are using. Tasting the finished food remains the best way to decide whether the adjusted blend needs more savoury depth or heat.
Scale recipes for meal prep and larger gatherings
Scaling works best when we multiply every ingredient from a written base recipe rather than estimating by eye. We mix the larger batch in a broad bowl, check that the colour and texture are uniform, then divide it into smaller jars if we will use it over several cooks.
For a gathering, prepare a little more than the first meal requires but avoid producing an enormous quantity without testing it. A consistent formula, clear labels and dry equipment make repeated cookouts much less stressful.
Conclusion
With a balanced base, fresh spices and a little attention to heat, we can make BBQ rubs that suit pork, beef, chicken, seafood and vegetables without relying on a complicated pantry. We can test small batches, adjust the seasoning to our cooking method and store the finished blend so it is ready for the next cookout. The best rub is the one that makes us confident at the grill and still leaves room to develop our own style.